This is a fun device I came up with. The problem is that we want to insert large brackets [, ] into a table, but we don’t know how big the brackets are going to be until we measure the rest of the table.
The device - Part I
This is the part that does make-measure-make.
/// Create an element using `func`; then measure it using `measure-func`
/// then create the final version of the element again using func, this
/// time with the size info from the first try.
#let measure-and-make(func, measure-func: measure-table) = context {
  func(measure-func(func(none)))
}
We make a function that can build the table - with and without extra size information.
So we build the prototype, measure it, then build the real thing.
Table building function
#measure-and-make(sizeinfo => {
set text(size: 1.5em)
let nrows = 2
// use row height information from size profile with one row removed.
let row = if sizeinfo != none { sizeinfo.at(1).height / nrows } else { 1em }
let delimheight = row * 0.90 * nrows
let delim(p) = table.cell(rowspan: nrows, $lr(#p, size: #delimheight)$, inset: 0em)
let open = delim([\[])
let close = delim([\]])
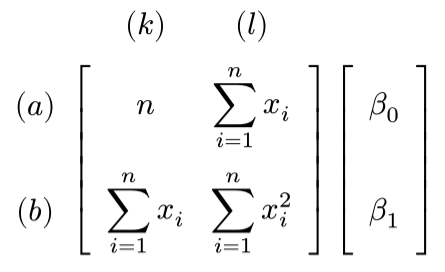
rowtable(
stroke: 0.10pt + blue,
align: horizon,
inset: 0.4em,
$ & & (k) & (l) &&& $,
$ (a) & open & n & sum_(i=1)^n x_i & close & open & beta_0 & close $,
$ (b) & sum_(i=1)^n x_i & sum_(i=1)^n x_i^2 & beta_1 $,
)
})
The device - Part II
We can measure all row heights of a table using a function. It works like the below. Use a show rule to hide the first few rows, and measure the rest of the table.
for i in range(max) {
  let sz = measure({
    show table.cell: it => {
      if it.y < i { none } else { it }
    }
    t
  })
  // elided - see details below for the full code
}
Measure table's all row heights
/// Measure a table's size
/// Successively remove display of each row
///  (first full table, then remove 0, then remove 0 and 1, and so on).
/// Returns an array of measurements which is a size profile of the array's rows
/// (or columns if `attr: "x"`)
#let measure-table(t, min: 0, max: 50, attr: "y") = {
  let wh = (x: "width", y: "height").at(attr)
  let result = ()
  for i in range(max) {
    let sz = measure({
      show table.cell: it => {
        if it.at(attr) < i { none } else { it }
      }
      t
    })
    result.push(sz)

    if i > min and (sz.at(wh) == 0pt or result.at(-2, default: none) == sz) {
      break
    }
  }
  result
}
This is what the table looks like when we measure it in each iteration:
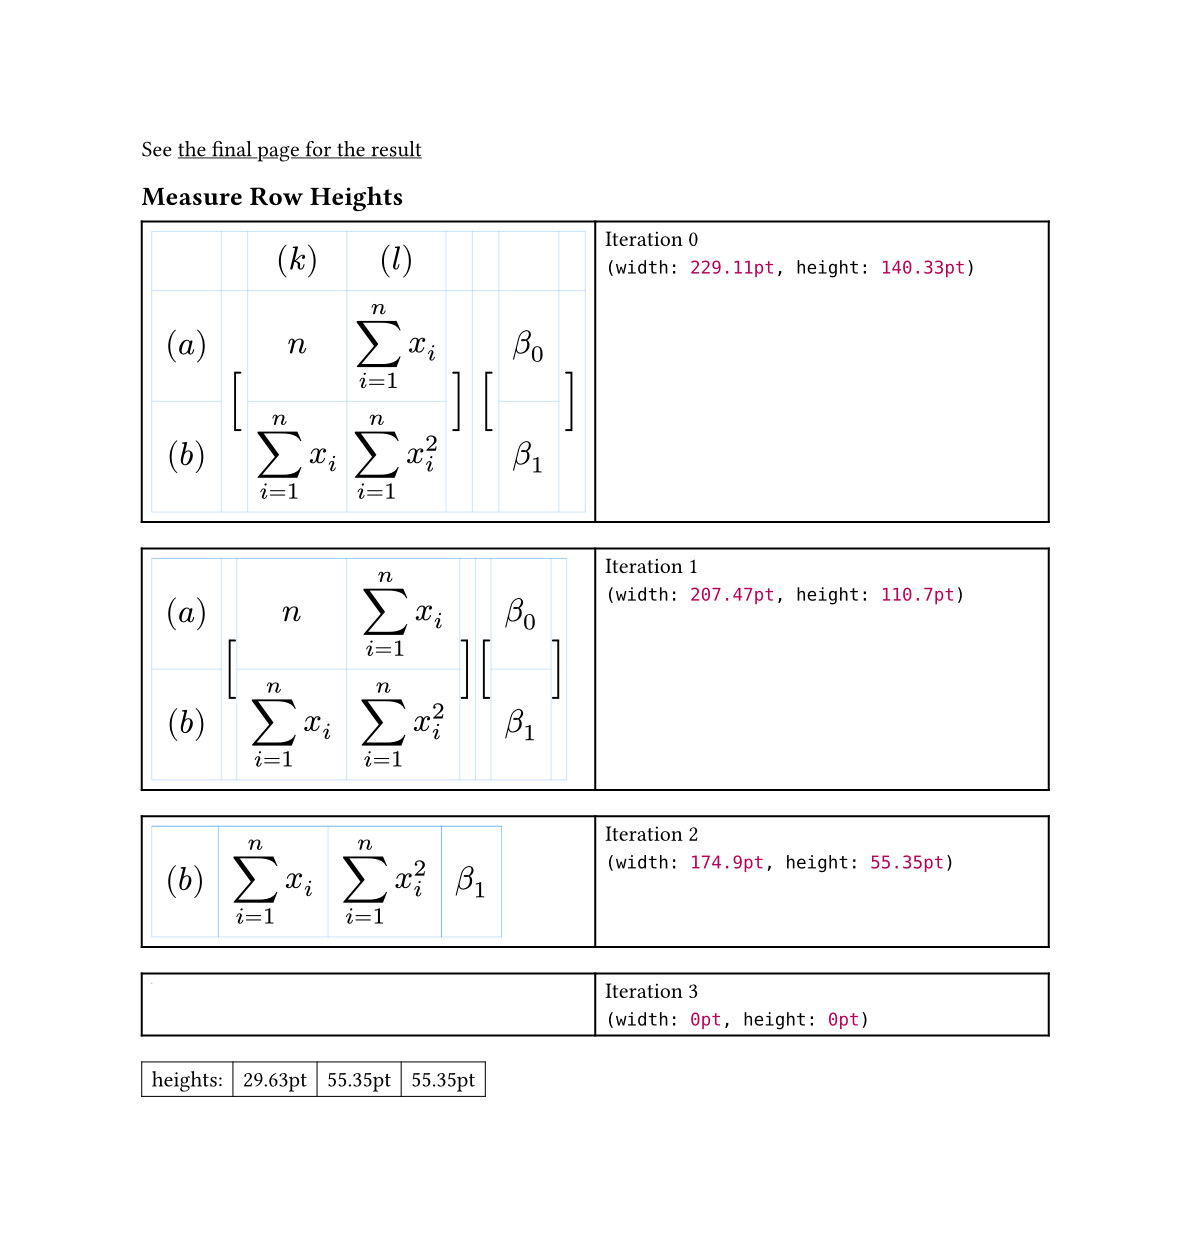
As you can see we have inserted our placeholder [, ] brackets of size 1em in this first measurement round. Then we use the computed heights of rows 2-3 (all but first row) to decide the final size of the delimiters.
This function creates a size profile for the table! It’s kinda fun. ![]()
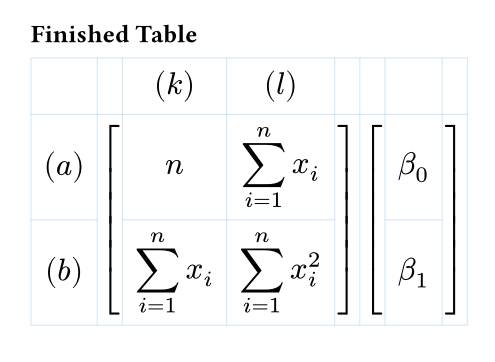
The finished table with final delimiter sizes look like this. And it draws the grid lines just to show how the table is constructed.
See the full code in an example project here. The example is using rowmantic 0.3.0’s new support for rowspan inside equation rows, and it will be published relatively soon.
This is also similar to this question about annotating a matrix and its answer: How can I label the columns and rows of a matrix? - #5 by miles-1