I just released a new version of frame-it.
I would like to repeat parts of the post I made on the initial release to give an intro to my package.
frame-it provides you with frames around whatever you like. I designed it with theorems, definitions, … in mind, but you can freely define the variations, supplements and colors at the start of your document.
By default, it ships with two main styles.
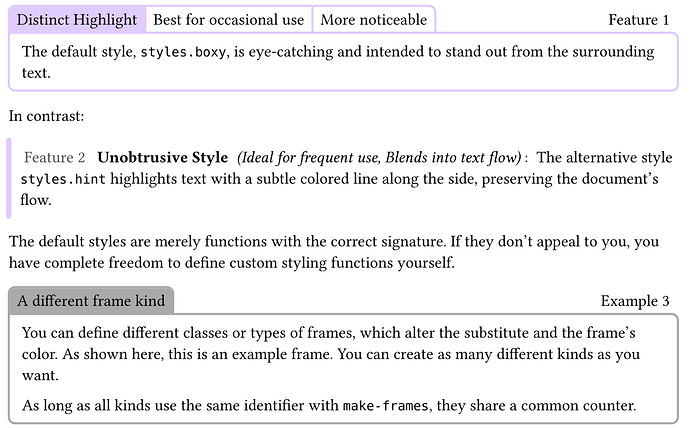
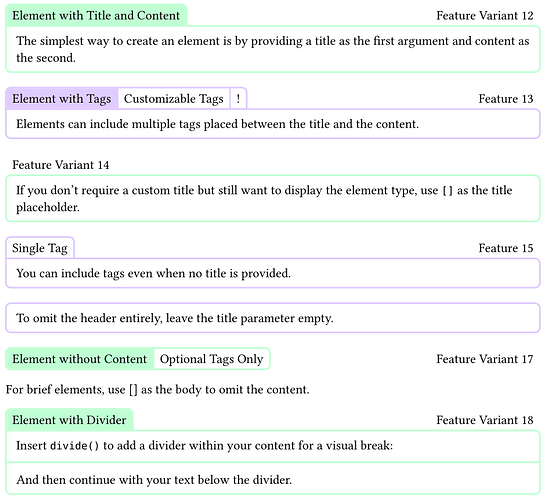
With the concept of tags and titles, you can style your frames in a lot of diverse end expressive ways.
Syntax
I spent a lot of effort to design the syntax as expressive and easy as possible:
#import "@preview/frame-it:1.1.0": *

#let (example, feature, variant, syntax) = frames(
  feature: ("Feature",),
  // For each frame kind, you have to provide its supplement title to be displayed
  variant: ("Variant",),
  // You can provide a color or leave it out and it will be generated
  example: ("Example", gray),
  // You can add as many as you want
  syntax: ("Syntax",),
)
// This is necessary. Don't forget this!
#show: frame-style(styles.boxy)
And here is how you would use it to get a frame as shown above
#example[Optional Title][Optional Tags][...][
  Body, i.e. large content block for the frame.
]
If these stylings are not enough, you can create your own style function which receives all the information available and can return whatever content it likes.
The default stylings are implemented without magic using this system.
On the implementation
All these screenshots are taken from the README which explains everything in much greater detail.
I also want to mention how I implemented this technically. For me, it was important to separate the styling from the content in this release.
The system I came up with uses metadata to store the information in the figure caption.
This also has the benefit that the information will never be displayed and for example outlines will display only the correct content of the caption while the information about the body is also there but hidden as metadata.
I do this using these functions:
// Encode info as invisible metadata so when rendered in outline, only the title is seen
#let encode-title-and-info(title, info) = (
  metadata(unique-frame-metadata-tag) + metadata(info) + title
)
#let retrieve-info-from-code(code) = code.children.at(1).value
#let code-has-info-attached(code) = (
  "children" in code.fields().keys()
    and code.children.first().fields().at("value", default: "")
      == unique-frame-metadata-tag
)
When someone applies a style using the correct show rule, this adds a line to the document
#show figure.caption: caption => {…}
and using the function from above, I can disambiguade whether the caption comes from a figure which is a frame or not. If so, I add a show rule which displays the styled frame instead of the default caption.
Blog post about the Readme
I managed to display a light or dark verion of my Readme depending on the color scheme the user has selected.
In case you are interested in how I did this, I wrote a post about it on the typst forum.
Thanks for reading :)
If you’ve been looking for something like this before, go check out the README. If you have questions, I would be glad about feedback and opinions. Also feel free to submit an issue on GitHub :)